Homemade tortillas are versatile and essential in the kitchen, standing out among culinary creations. Originating from the heart of Mexican cuisine, this thin, unleavened flatbread has become a global sensation, loved for its simplicity, flexibility, and deliciousness.
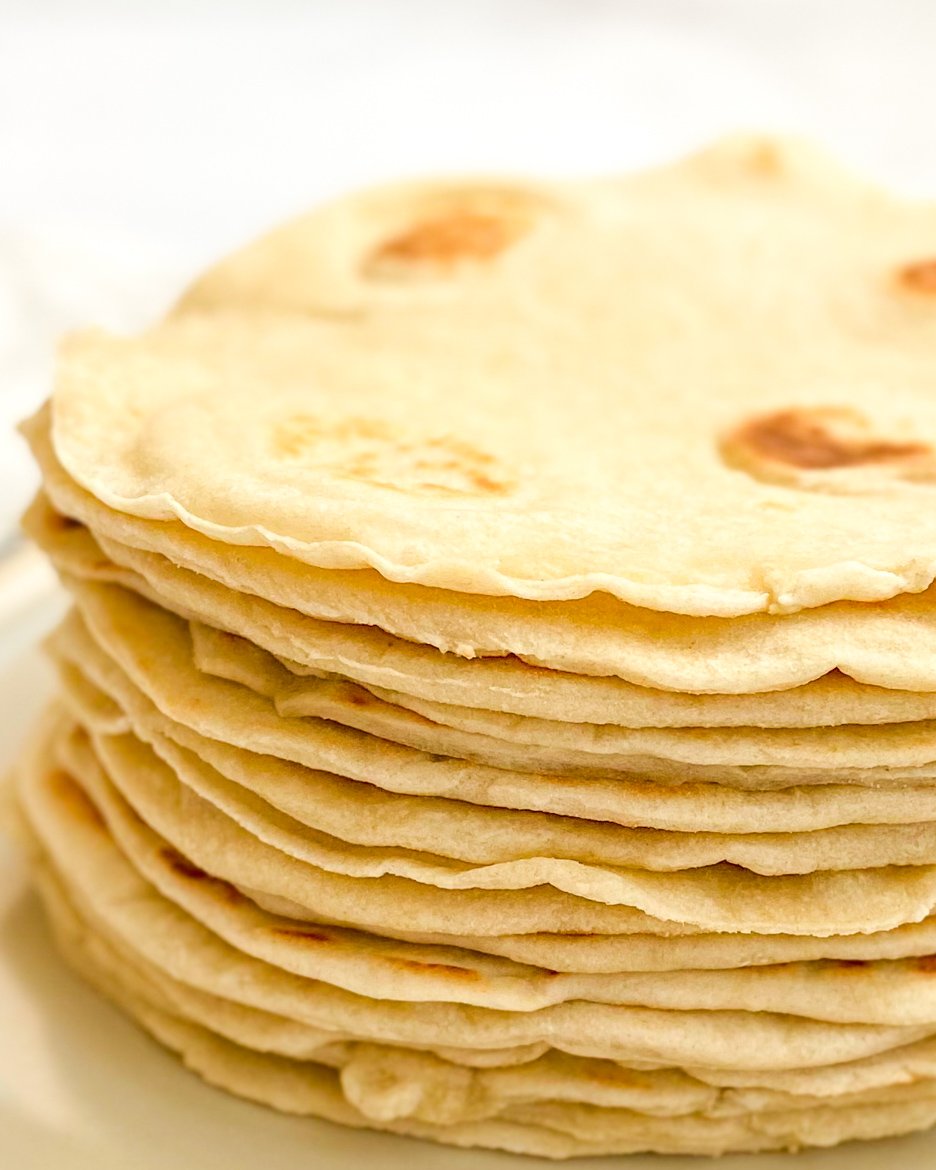
If you want to learn how to make soft and flexible homemade tortillas that taste much better than store-bought ones, look no further! With this recipe, you can make tortillas in any size you want. Once you try making them yourself, you’ll never go back to buying them from the store. These homemade tortillas are not only delicious but also easy to prepare in advance. To serve, simply heat them in the microwave or on the stove.
Table of Contents
INGREDIENTS FOR HOMEMADE FLOUR TORTILLAS
- Flour: At the core of any great tortilla recipe lies the flour. Typically, all-purpose flour is used, providing the right balance of gluten for elasticity and tenderness. This ingredient is the canvas on which the rest of the flavors will dance.
- Salt: The flavor enhancer. A pinch of salt may seem minor, but it’s the secret behind enhancing the flavors of your homemade tortillas. It brings out the natural taste of the flour and adds a subtle savory note to the final product.
- Water: The binding element. Water acts as the glue that brings the dough together. Adding water in the right proportion ensures a pliable and easy-to-work-with dough, allowing you to achieve that perfect thinness in your tortillas.
- Baking Powder: The leavening agent. While traditional tortillas are unleavened, a touch of baking powder can contribute to a lighter texture. It’s a subtle addition that can make your homemade tortillas soft and slightly puffy.
- Olive Oil: The moisture infuser. For that extra touch of richness and moisture, incorporating a bit of olive oil into your tortilla dough can elevate the flavor and texture. It adds a subtle complexity that complements various fillings.
HOW TO MAKE HOMEMADE TORTILLAS: STEP-BY-STEP GUIDE
Making homemade flour tortillas is a rewarding culinary endeavor that adds a personal touch to your meals. These soft, pliable discs are versatile and can be used in various dishes, from tacos to wraps. Here’s a simple step-by-step guide to help you make delicious homemade flour tortillas:
- Prepare the Dough: In a large mixing bowl, combine the all-purpose flour, salt, and baking powder. Add the olive oil to the dry ingredients, mixing until the mixture resembles coarse crumbs.
- Add Water: Gradually add the warm water to the flour mixture, stirring continuously. Continue to mix until the dough comes together. If the dough is too sticky, add a little more flour. If it’s too dry, add a bit more water.
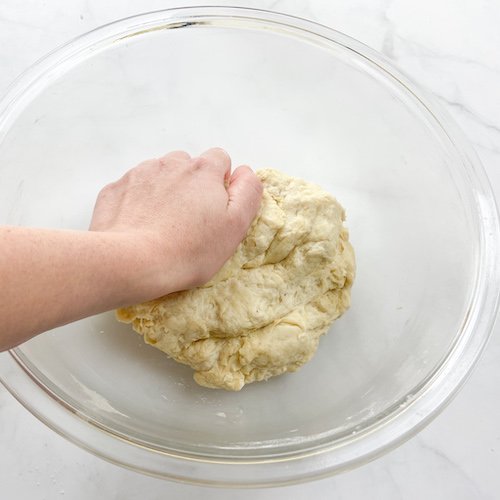
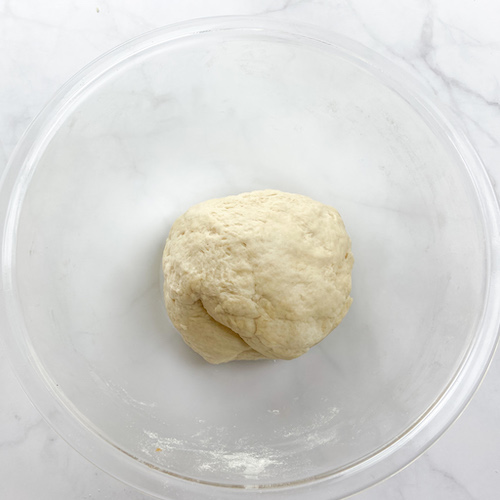
- Knead the Dough: Transfer the dough to a floured surface and knead it for about 3-5 minutes until it becomes smooth and elastic.
- Divide the Dough: Divide the dough into golf ball-sized portions. You should get approximately 10-12 balls, depending on the desired size of your homemade tortillas.
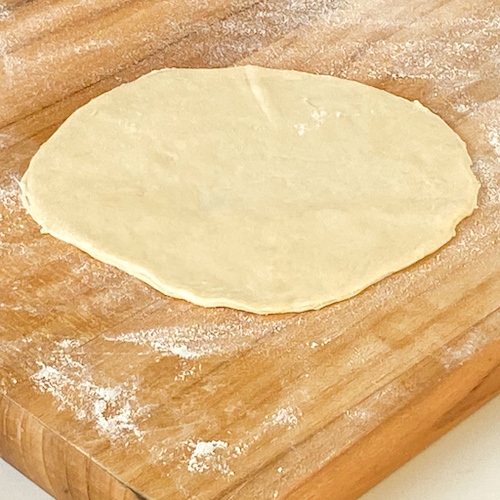
- Rolling the Tortillas: On a floured surface, roll each ball into a thin, round disc. Aim for about 6-8 inches in diameter. You can use a rolling pin or the palms of your hands.
- Heat the Skillet: Preheat a skillet or griddle over medium-high heat. It’s essential to have a hot surface for cooking the homemade tortillas.
- Cook the Tortillas: Place a rolled-out tortilla onto the hot skillet. Cook for about 30 seconds to 1 minute or until small bubbles appear on the surface.
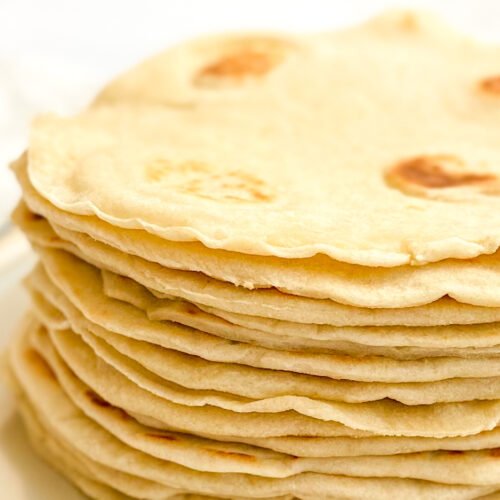
- Flip and Cook: Once you see bubbles, flip the tortilla and cook the other side for an additional 30 seconds to 1 minute. You should see light golden brown spots on both sides. (If flour accumulates in the skillet, wipe it between tortillas with a damp paper towel.)
- Keep Warm: As you cook each tortilla, place them on a plate and cover them with a clean kitchen towel. This keeps them warm and pliable.


TIPS FOR PERFECT TORTILLAS
- Use Warm Water: Ensure the water you add to the dough is warm. This helps activate the gluten in the flour, resulting in a more elastic and pliable dough.
- Don’t Skip the Resting Time: Resting the dough after kneading is important as it allows the gluten to relax, making it easier to roll out tortillas. If you notice the dough shrinking while rolling it out, the gluten hasn’t relaxed enough. Simply let it rest for another 15 to 30 minutes before trying again.
- Experiment with Thickness: The thickness of your tortillas can vary based on personal preference. Thicker tortillas are suitable for hearty wraps, while thinner ones are ideal for delicate dishes like tacos. Thick tortillas won’t puff up.
- Temperature Matters: Ensure your skillet is adequately preheated. A hot surface is key to achieving that slight char and perfect puffiness.
- Try Different Oils: Experiment with different oils for added flavor. Olive oil provides a subtle richness, but you can use vegetable oil or even melted butter for a different taste.
- Keep Them Covered: To prevent drying out, cover your freshly cooked tortillas with a clean kitchen towel or tortilla warmer while you finish the batch.
- Press or Roll: If you want a perfectly round shape, use a tortilla press. For a more rustic look, roll them out with a rolling pin.
- Making in Advance:If you want, you can make the dough in advance. Just make the dough and let it rest for 10 minutes. Then cover tightly with plastic wrap and refrigerate for up to 48 hours.
- Rigid Tortillas: If your homemade tortillas feel rigid after cooking, you cooked them too long or the heat was too high. Cook them just long enough to get some bubbles on the surface and some light brown spots on the bottom. Then turn them over and cook for another 30 seconds.


STORAGE OF HOMEMADE TORTILLAS
Store your homemade tortillas in an airtight container or ziplock bag at room temperature for short-term use 5-7 days, but they will become stiff when cold. When you want to use one or two, place them on a slightly damp paper towel and microwave for 10-20 seconds. They will be nice and soft again.
For longer storage, freeze them with parchment paper between each tortilla.

WAYS TO ENJOY TORTILLAS
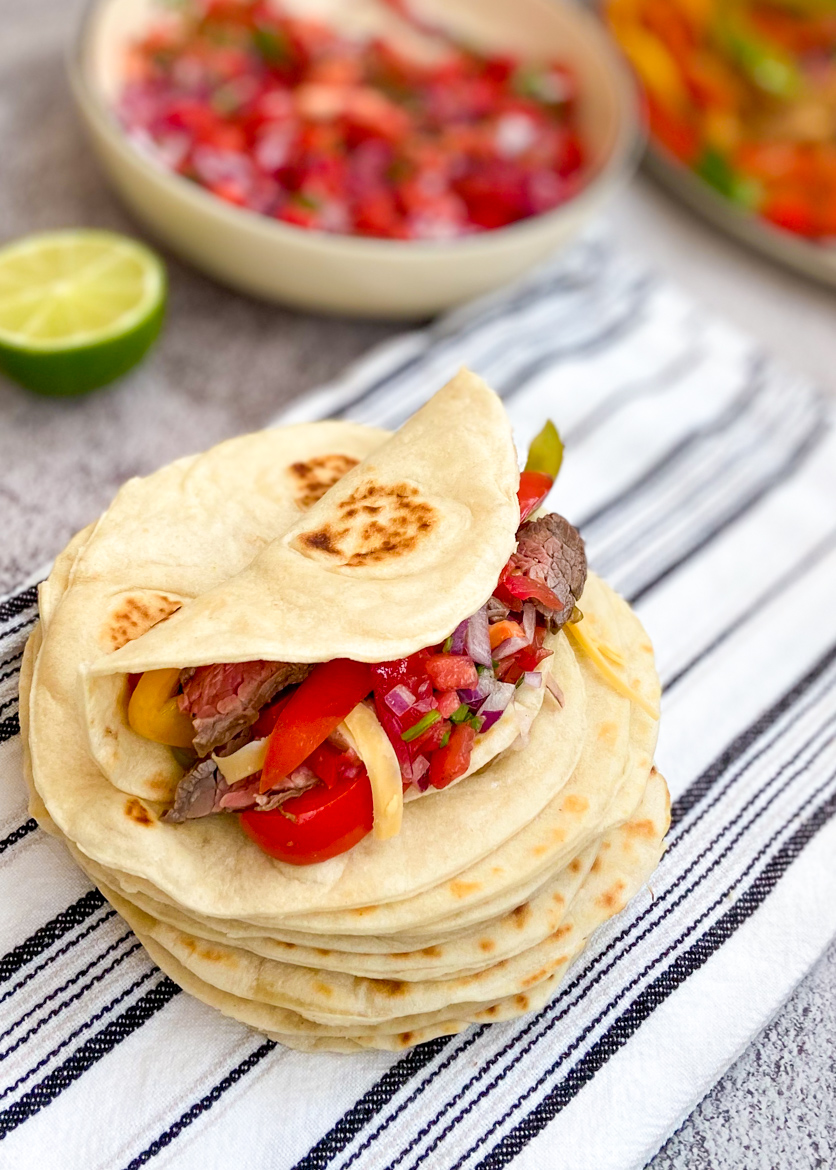
1. Classic Tacos and Burritos: Stuff your homemade tortillas with seasoned meats, beans, cheese, and your favorite toppings for a classic taco or burrito.
2. Quesadillas: Layer cheese between tortillas and cook until melted for a quick and satisfying quesadilla.
3. Wraps and Roll-Ups: Use homemade tortillas as a wrap for sandwich fillings, creating a portable and mess-free meal.
4. Chips and Salsa: Cut tortillas into triangles, bake until crispy, and enjoy with your favorite salsa, guacamole, classic hummus, or green hummus.
5. Pizza: They can also be used as a base for super thin pizzas. Just brush lightly with olive oil and top with your favorite pizza ingredients. I love pesto, some fresh mozzarella, bacon, and a sprinkle of fresh herbs. Place them in a very hot oven (440˚F/230˚C) for 4-5 minutes or until golden.
Tortillas, with their simple yet foundational ingredients, have transcended cultural boundaries to become a culinary staple worldwide. From their creation in Mexican kitchens to gracing tables across continents, these flatbreads are a testament to the beauty of simplicity in cooking. Whether you’re a seasoned chef or a novice in the kitchen, mastering the art of tortillas opens up a world of delicious possibilities. So, roll up your sleeves, embrace the simplicity of flour, salt, water, baking powder, and olive oil, and embark on a culinary journey that celebrates the art of the tortilla.
How to Make Homemade Flour Tortillas
Equipment
- Large bowl
- Spatula
- Rolling Pin
Ingredients
- 3 cups (360g/12.6oz ) wheat flour
- 1 tsp salt
- 1 tsp baking powder
- 1 cup warm water
- ⅓ cup olive oil
Instructions
- In a large mixing bowl, combine the all-purpose flour, salt, and baking powder. Add the olive oil to the dry ingredients, mixing until the mixture resembles coarse crumbs.
- Gradually add the warm water to the flour mixture, stirring continuously. Continue to mix until the dough comes together. If the dough is too sticky, add a little more flour. If it’s too dry, add a bit more water.
- Transfer the dough to a floured surface and knead it for about 3-5 minutes until it becomes smooth and elastic.
- Divide the dough into golf ball-sized portions. You should get approximately 10-12 balls, depending on the desired size of your tortillas.
- On a floured surface, roll each ball into a thin, round disc. Aim for about 6-8 inches in diameter. You can use a rolling pin or the palms of your hands.
- Preheat a skillet or griddle over medium-high heat. It’s essential to have a hot surface for cooking the tortillas.
- Place a rolled-out tortilla onto the hot skillet. Cook for about 30 seconds to 1 minute or until small bubbles appear on the surface.
- Once you see bubbles, flip the tortilla and cook the other side for an additional 30 seconds to 1 minute. You should see light golden brown spots on both sides. (If flour accumulates in the skillet, wipe it between tortillas with a damp paper towel.)
- As you cook each tortilla, place them on a plate and cover them with a clean kitchen towel. This keeps them warm and pliable.